Jet9- First impressions on a “real” ride

Matt McCulley and I headed out Monday night for a quick road trip to Syllamo. Since the Shelby Farms ride was so crappy, I wanted to get the Jet9 out on some decent singletrack before I wrote up anything resembling a review.

Since Syllamo’s Revenge is gone until next year, I figured I’d try some clockwise riding (the whole race course is counter-clockwise, so I’ve been riding that way for months in order to practice). I must say, the Blue & Orange loops (at least the parts on the East side of Green Mountain Rd.) ride much better going clockwise.

The Jet is a different animal than the Air. The best way I can compare it is going back to when I used to train/show horses- you can have two equally awesome horses, but the way you ride the two can be significantly different. The Jet is all business. I’d become very accustomed to the manner in which the Air deflected off of rocks and off-camber roots. I just didn’t realize it until I started really going at some of the tech-y, rocky stuff at Syllamo.

The Jet is very, very precise. You point it towards something and pedal, it’s going to generally track in a straight line up and over; it’s a combination of several things- the 20mm Maxle, the tapered steertube/stiffness of the frame, and, of course, the rear suspension. The result was me screwing up through the rocks a few times at first. I’d be expecting the bike to zig or zag when it would just keep rolling like the rocks didn’t exist.
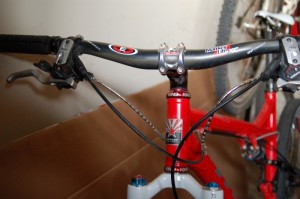
For whatever reason, the bike also feels “light” in front. Going up rocky, steep climbs, there were several instances where I’d accidentally unweight my front wheel enough that I’d lose the ability to steer and end up in the bushes on the side of the trail. Once I dropped the stem down under the 10mm spacer I’d had between it & the headtube, this was not as bad, and I was able to use the “lightness” more to my advantage to get over the same sort of rocks that had been stalling me out. I started really liking the rocky climbs- the rear suspension on that bike is really, really nice, and the pedal bob is minimal.
It is going to take a few more rides on the more difficult trails to really get used to the handling, but I don’t consider that a bad thing at all, just something I will eventually grow accustomed to. I’m looking forward to getting it back out sometime soon!

Unfortunately, our ride was cut short by thunderstorms. We ended up riding in the downpour/lightning up Green Mountain Rd from the White River Bluff trailhead to the car at the Bald Scrappy trailhead. We’d both gotten our share of mud and slippery, wet rocks back at Syllamo’s Revenge, so we headed back to the cabin to dry out before heading back to Memphis.
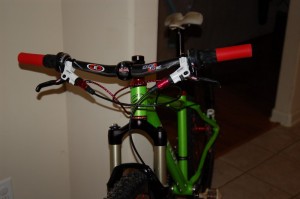
Cable Housing: Alligator I-Link vs. Nokon

I put Alligator I-link housing on my Air9 last year, and I’ve been really happy with it. Ryan’s Titus needed new derailleur housing/cables, and I got a deal on some Nokon (which is normally much more expensive than I-Links), so I figured I’d give it a shot. Here’s the rundown:

Looks. If you’re interested in looks, then Nokon wins. That is, if you have enough of the segments to house your entire bike. On a mountain or CX bike, you’re going to need extras. I ended up using a standard piece of housing for the aft front derailleur section. Nothing like cursing your way through an entire install (more on that later) only to find you can’t finish it up right unless you purchase more parts. Here are some photo comparisons:

DSC_0176

DSC_1707

Installation: Alligator wins, hands-down. It’s pretty self-explanatory. You run the cable through the liner, then run the whole thing through the sections of links that you size to match the length of your old housing. The links snap together and slide on/off of the cable/liner very easily, so it’s a quick insallation.

Nokon, on the other hand, is a total pain. The sections do not snap together, so you have to thread them on to the liner in order to test-fit the housing length. They don’t thread on easily (their fit on the liner is really tight). It’s difficult to keep the liner flush with the hole where the cable exits the shifter, and the kit isn’t actually made to run the liner continuously (though I did it, anyway). Like I said before, if you’re installing it on to anything other than a road bike, you’re likely going to need extra Nokon links. The cables are fat and uncoated as well.

Performance: I’ve been using the I-links for several months now- ocassionally in some horrible conditions. They’ve never let me down. The Nokons seem to be ok for now, and I can’t see any reason why they wouldn’t do just as well. Time will tell on that one.The I-link system is reported to be lighter, also. I have not weighed them myself, but that’s the general consensus on various internet forums.

So, there you have it. My verdict is, unless you are wanting the “prettiest” housing system out there, go with Alligator. It’s cheaper, lighter, and 11ty billion times easier to install.

Saddle Swapping

I haven’t posted a “saddle update” in a while… if you’ve been reading since the beginning, you know that I’ve had quite the time trying to find a saddle that doesn’t somehow cause pain or injury to my undercarriage. I finally settled on the Selle Italia SLR Lady- wide enough (155mm), a large cutout, and a tolerable amount of padding.

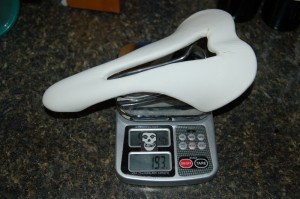
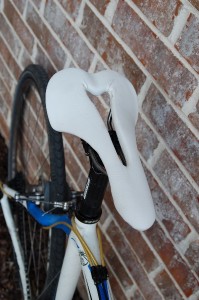
Well, the first Selle Italia SLR Lady finally wore out. I ordered a new one, but soon after, a friend of mine from the Road Bike Review Lounge sent a saddle to me- a while back, I’d tried the Selle Italia Diva, but found that the padding was excessive. Instead of giving it away, I sent it to him and he removed the cover & padding, then replaced it with a thin layer of foam and new leather-ish cover. I rode it for nearly 160 miles over the weekend and absolutely loved it. Photos:

160mm wide and <200g!!

top

Sunday, Ryan and I were in Outdoors Inc. when I noticed that Fizik has a new women’s saddle- the Vesta. It’s like the Vitesse (a decently wide, curvy saddle), but with a pressure-relief channel down the middle. I asked if there was a demo model, but they didn’t have one. However, Joel, the bike shop manager said he’d like a review of it, so he let me take it to give it a whirl. Sweet! I’m gonna head out for ~50 miles tomorrow since the weather is going to be pretty nice.

I’m wondering if Fizik saw this post that I made a little more than a year ago…

Product Review: Wingnut “Splitback” Hydration Pack

After the severe back pain I experienced at the Lock 4 six-hour race a few months ago, I decided to try a Wingnut pack (specifically, the Splitback model). They’re designed to sit lower on your back, distributing the weight of the pack across your hips rather than up on your shoulders.

First off, you are going to pay more for one of these packs than you will for a traditional “camelback” style pack. They also don’t include a bladder.

However, after just a few uses, the cost has been more than justified with me. I’ve been on multiple 4+ hour rides since I purchased it, and I haven’t experienced any back pain (I’d originally thought that bike fit/saddle/general fitness might have had something to do with my pain, but apparently not). The construction is excellent- it’s lighter than most packs, but handling it, you get the sense that it will last forever. My favorite part is the side pockets- they’re roomy and really easy to get to while you’re riding (I even manage to get to fish stuff out while wearing heavy winter gloves).

The capacity of the Splitback is excellent- it can easily hold a 100oz bladder and whatever else you want to pack in- when I’m out for a long time on the trail alone, I usually carry food, a small camera, phone, folding saw, extra gloves, multi-tool, emergency blanket, lighter, pocketknife, waterproof shell (if rain is in the forecast) and still have room to stash a layer or two if I remove one while I’m out riding. Unlike some other packs that can hold this much (530 cubic inches), the Splitback only weighs 13oz. Salomon makes a comparable one (weight/cost wise) that’s slightly larger but doesn’t feature the “lowrider” system of the Splitback.

I know I sound like a total shill here, but with the humongous improvement I’ve had in my ability to ride for hours without pain, I can honestly say that this is one of the best (if not the best) pack available.

Get one!

Brick-a-riffic

After washing bikes this morning, I thought up a fun plan for the day’s training. Jens was at Bikes Plus in Germantown getting a brake lever replaced (it wasn’t my fault! Warranty issue…), so I decided that I’d do a training brick (two or more activities back to back) and run to the shop then ride back home. I couldn’t fit my cycling shoes in my camelback, so I just wore my Saloman trail shoes, packed some flat pedals, and strapped my helmet to the back.

I didn’t set out until around 11:00, so yes, it was very hot and humid. It’s OK… there’s only one way to get better at racing in the heat, right? Along the way, I remembered that my dad had been bugging me to “help him” (read- do it myself under his direction) move a load of sand off of a trailer in his yard.

Side note: No one knows why Gerald felt compelled to buy 1 ton of red sand, but you can bet he got a good deal on it.

Anyway- the shop ended up being 11.5 miles away. I drank about two liters of water and ate a powerbar getting there. I chatted for a few minutes, refilled the camelback, and rode 3.5 miles to my parents’ house to move some sand. Surprisingly, it only took about half an hour. Afterward, my mom made a PB&J for me and I washed it down with a few ginger snaps and a dark chocolate truffle. I added some ice to my water and was out the door again to finish my day with a 15 mile ride home. The “nice” thing about riding back to my house from Germantown is that the last 4 miles takes you from the Wolf River up about 150 feet of elevation gain to my house. It’s not really that bad unless you preceed it with 3 hours of other activity, then it’s a bit of a hump.

Gotta clean up & go to the store now. Any suggestions for dinner?

Product Review: UVEX Boss Race Helmet

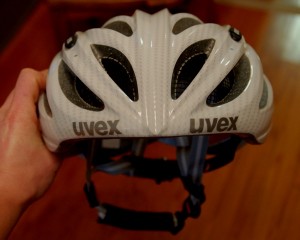
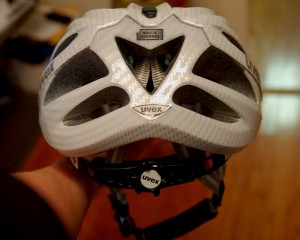
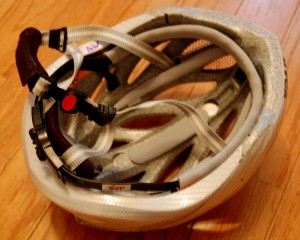
I picked one of these up while I was at Valley of the Sun over the weekend, and I am incredibly impressed with it. It’s really light (which is nice with my neck issues), and I LOVE the straps and inner fittings. The chin strap has nice padding, and the closure is adjustable, so it’s really simple to loosen or tighten on the fly while you ride (my straps always loosen up as they get damp & sweaty). The back has a twist-to-adjust thing on it, too.
Inside, it’s got a full sweat band in the front that keeps much more sweat off of your face than the usual interspersed pads on other helmets. The bug guard is nice to have, too, though there aren’t too many bugs out this time of year.

Here are a few photos:

front

rear

inside

Get one.

Product Review: Descente “Wombat” Gloves

…possibly another addition to my “top 10 favorite things of all time” list.

Those of you that know me might know that I have HORRIBLE problems with cold hands in the winter. I have all the syptoms of Reynaud’s Phenomena, so cold hands to me aren’t just uncomfortable- they’re effing PAINFUL and put me at risk for tissue damage.

Because of this, good gloves are a must for me. I’ve got a pair of Pearl Izumi “lobster” gloves, which I don’t especially like because A) They’re PI, and I think that PI is trash for their latest ad campaign, B) the liner is really bulky, and C) if I sweat in them, they get reeeealy cold and cause my usual hand issues.

So, when it got cold out, I went out in search of something less bulky than the lobsters, and NOT made by PI (I swear, if you have any respect for female cyclists, you’ll avoid giving them your money). Enter the Descente “Wombat” glove. They’re a mid to heavyweight glove that have a cool little wind/waterproof “mitten” cover that can either wrap around your fingers or tuck into the back of the glove if not needed. They’ve also got a decent amount of snot-wipe area, and stretchy, articulated knuckles.


I LOVE these! The knuckles make them much more “wearable” than other gloves in the same category- meaning that you don’t have to take them off if you want to lock a door, use an allen key to adjust your saddle, zip your jacket, etc. The finger cover is the absolute BEST feature, though. I pull it over my fingers for the first few minutes of a cold ride while I’m warming up, then tuck it in, and will get it back out any time my fingers threaten to lose circulation… and it’s worked so far!

Yesterday was a great test- temps in the low 40’s, and two hours of riding followed by a 10 minute rest stop and another two hours of riding. Typically, the worst pain I experience is following a rest stop- my gloves are sweaty, then I stop, and both me and the sweat cools off, so when I start back, the cold, wet gloves will often cause the painful vasospasm associated with Reynaud’s. After my rest stop, I pulled the windproof covers over my fingers and it prevented this from happening! Not to say that my hands didn’t get a bit cold, because they did. They just didn’t get to the point of losing circulation & going numb.

As long as these don’t disintegrate like the Gore Vulcano gloves I bought last year, they’re WELL worth the $55.00 I paid at the LBS (you can get them cheaper online, but I can’t stand buying gloves w/out trying them on).

UPDATE: I wore them today w/temps in the 30’s, and they were comfy. I’ve seen reports of people using them in colder temps, but I think that I’ve found my personal limit for them.

Pearl Izumi, WTF were you thinking?!?

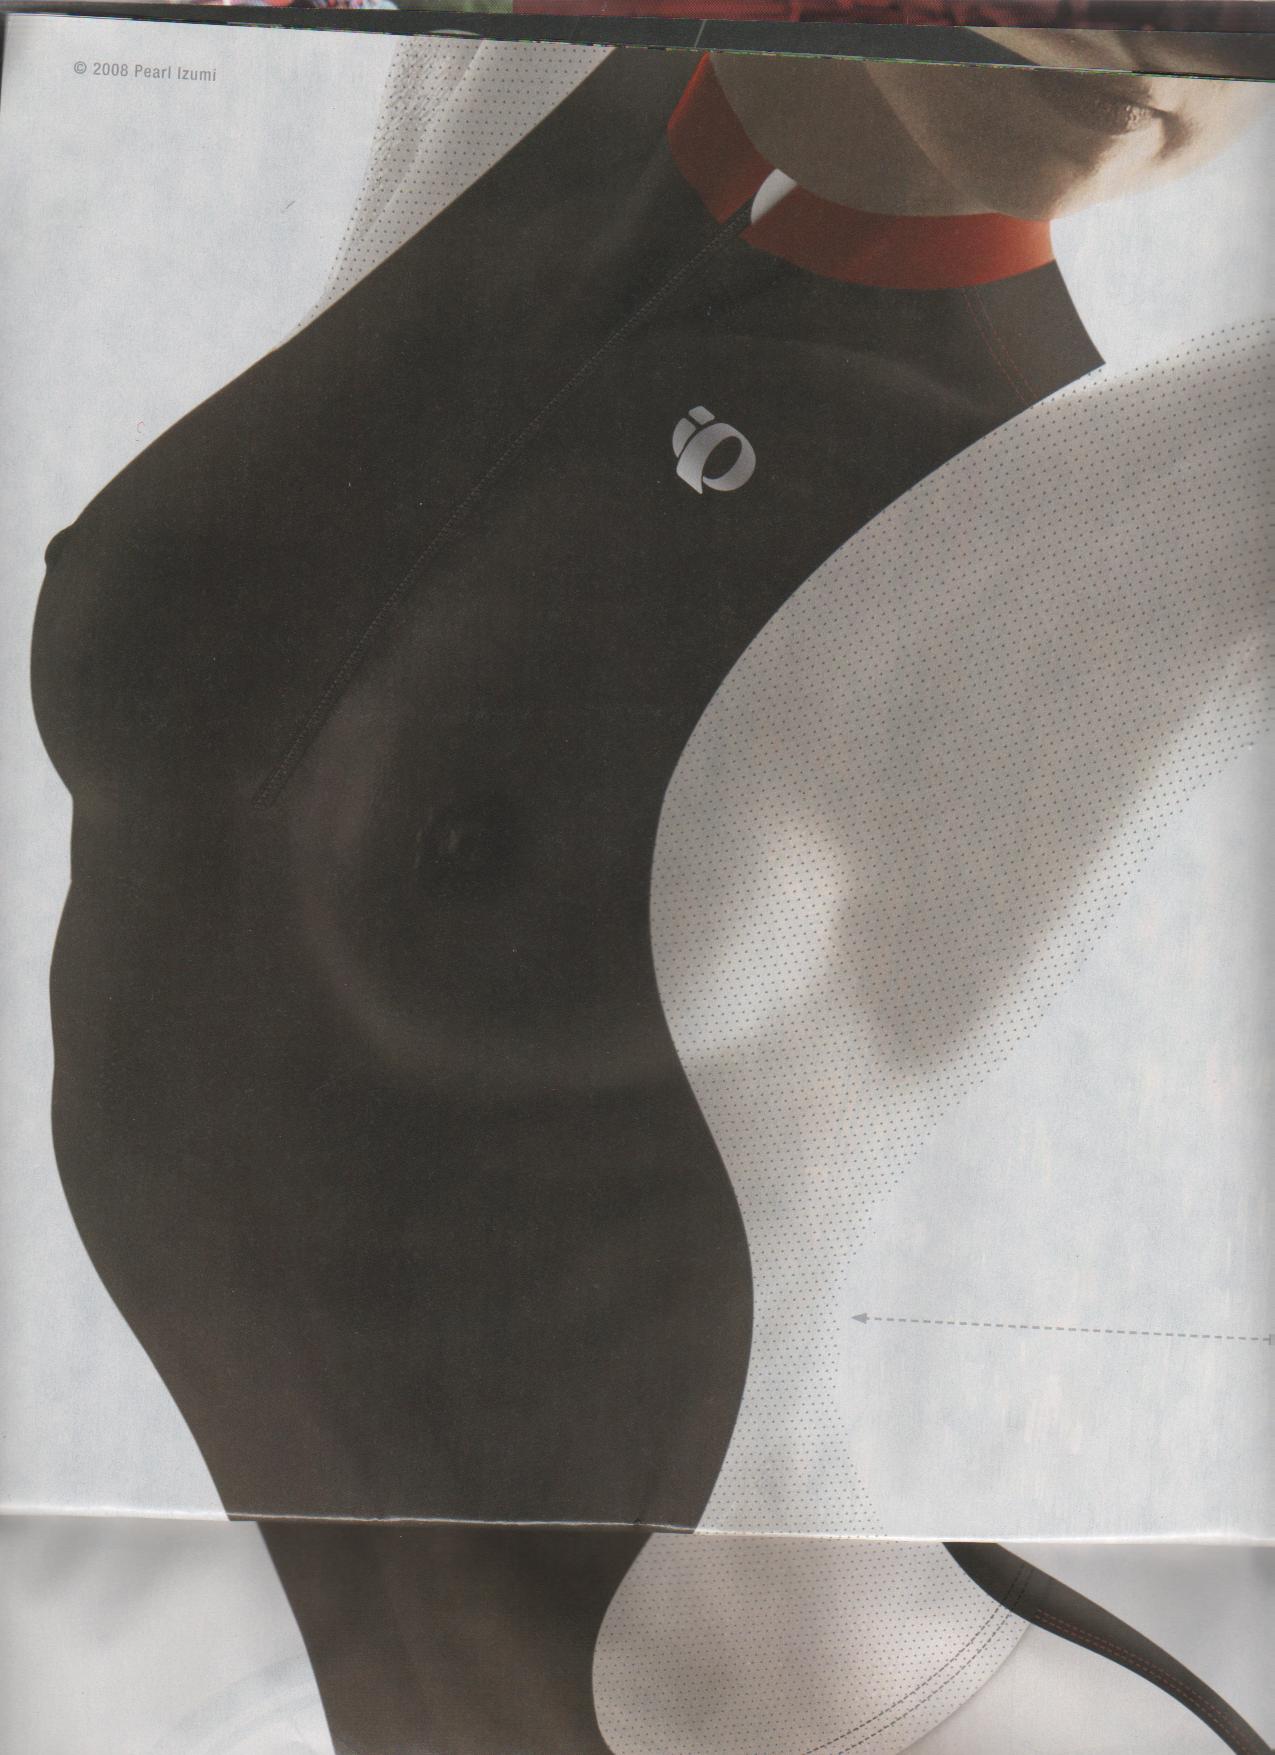
So I’m flipping through Velonews and I come across an ad for Pearl Izumi clothing. However, the ad tells me nothing about the clothes, because it’s essentially (for lack of a better term) faceless tits in a jersey (see photo below… warning- may be offensive to some). Now, I’m not one to get worked up over some nudity in most situations, but this is blatant “sex sells” advertising. It’s objectifying and disrespectful. I find it to be somewhat of a slap in the face to the women like myself who take their sport very seriously, and don’t care to be percieved as some sort of jersey-meat for the purpose of advertising.

I’ve emailed both Pearl Izumi and Velonews about the lack of taste in their advertising, and have encouraged others to do the same. Somehow, I doubt it will change anything. I’m “voting with my wallet” as well. Looks like I’ll be sending those gloves back that I just ordered. I encourage anyone who thinks that women in jerseys deserve better to do the same thing.

A scan of the page in question (courtesy of Mimi from the Team Estrogen web forum- I’ve made it small on purpose. Click for full-size):

Another reason to shop at Ibex

Not only is Ibex wool wonderful, their customer service is awesome!

I ordered some arm warmers back in June, only to find that they were too big. I sent them back to exchange them for a small, but somehow I left the return address off of the return form (I guess I was assuming that if they’d sent it to me, then they’d know where to send it back).

Well, the replacements were sent to the only address they had in their system- my former apartment. I realized today that I hadn’t received the replacements (I hadn’t been thinking about winter clothes because it’s been hot). I emailed them, and figured out what happened. Even though I was the one that screwed up- they’re sending small arm warmers to me (at the correct address) anyway.

You guys rock.

Product Review: Zipp Vuka Base and Clip-on Aerobars

Now that I’ve had a chance to use these, I figured I’d let everyone know that they’re generally as kick as much ass as you’d expect out of anything from Zipp.

I am very impressed by the base bars- they have a fat, grippy section in the middle for the aero extensions to clamp onto. I also like how the base angles downward ever-so-slightly (as opposed to making you choose between either straight across or angled steeply downward). The outer grips are also comfortable for riding since they’re fat & sort of hand-shaped.

The clip-on extensions are infinitely adjustable and the bend is just right to keep your wrists comfortable. I’ve also sweated on the elbow pads like crazy and they’ve yet to become stinky :)

The SRAM shifters & brake levers are nice, and the carbon ties everything together. The shifters are a new style that don’t rotate as far down as the current style, making it easier to pull the lever back up if it’s ever all the way down.

The verdict- get it now! You can’t go wrong with Zipp/SRAM.