Cautious Optimism

As I mentioned in last week’s posts (as well as in TSE Journal #2 that I wrote for XXCMag), I successfully completed a sold block of training. It’s something I haven’t done much because of either A) work or B) some unforeseen issue like injury or feeling overly-fatigued. (glad to have eliminated option “A”) This time, however, I did it. Every minute of all of it. Perfectly.

Following that last big ride on Wednesday, my legs hurt like hell. I was supposed to do a 1hr recovery ride on Thursday, but all I could muster was a painfully slow ride to/from Outdoors (20 minutes round-trip) to give some love to the rear brake on my Air9 RDO. Apparently, some sort of reverse hydro brake jesus has been working his mojo on my bike, because the mineral oil inside had mystically been turned into black swamp water…

XTR brake

After flushing at least 4 syringes full of mineral oil into it and tapping it all over with a screwdriver to chase the bubbles out, it’s as good as new.

Aside from some pretty kickass yoga classes, I otherwise took it easy until yesterday, when I had a “half” training ride on the schedule. After making a Mother’s Day brunch that even Gordon Ramsey would be proud of, I went out to my favorite pain cave spot in Shelby Farms and proceeded to destroy my two prescribed intervals. They almost felt too good to be true.

Almost.

So, I get one more of the same abbreviated interval workouts between now and Syllamo’s Revenge on Saturday. I don’t ever like to get my hopes up about a race and the possibility to feel awesome, because there are soooo many other factors that go in to having a good race- especially at Syllamo, where the potential for outside killers like inclement weather and mechanicals is probably greater than any other race I’ll go to this season. It’s kinda like getting my hopes up for my birthday on Wednesday- all I can do is turn 32 as best as I can, but the quality of the birthday party is reliant on outside factors that I have little control over. Philosophy of “hope for the best, expect the worst” is implemented.


Just Riding Along and Stuff

Just Riding Along seems to be gaining some traction in recent episodes. If you aren’t sure what I’m talking about, you can check it out here: Mountain Bike Radio- Just Riding Along

The past few episodes, we’ve actually had more write-in questions via Facebook than what we can cover in the show, which is great, because it’s very effective insurance against dead air- on a related note, if you want to be 100% certain that we fully discuss a topic that you want information about, I’d suggest actually calling in during the show. We often times have to speculate, which is fun, but may not give you what you’re looking for. Added bonus- you’re also much more likely to win the giveaway if we’ve got one.

Since it seems we’ve got a good listener-base, I’ve also been trying to procure some product to test/review/talk to someone about on air, and, so far, I’m 0 for 3. Apparently, no one other than Bruce Dickman from ProGold sees the value in internet radio shows (nothing wrong with that, of course- we’re pretty huge fans of their products).

On the training front, everything is chugging along. I’m putting in approximately 15 hours per week (give or take), and, though my legs were arguing with me yesterday about the intensity of some 15 minute intervals (I eventually won the argument, but it took lots of loud music and hurt a lot), everything is going pretty well. The weather here is back to 40/windy/humid as f*** for the foreseeable future, so my volume is acutely stunted by taking to the occasional trainer ride. Not that I can’t get out in that stuff…

Tough day at the office

…it’s just some days, 40 and raining feels less tolerable than others.

In “mechanic of the century” news, I found one last thing that got killed by the mud/powerwashers at CX Worlds. Fullface Kenny was giving me a hand with a quick check of tension on my 2 sets of I9 wheels (normal suggested maintenance after the first few rides) when he found that all of the outboard bearings in my i25 road tubeless wheels were dead (not the wheels’ fault- this is guaranteed to happen to any bearing if you’re sloppy with the pressure washer). I hadn’t touched them other than one washing since we’d come back home, so I’d totally missed it. So, it was impromptu hub rebuild time at the shop. Luckily, Kenny has continued my legacy of bearing hoarding at the shop, so I was able to replace everything that was crunchy. I got artsy with Instagram (again).
P.S. In case you were wondering, after a little thrashing- including both Syllamo and Tour de Wolf (read- irresponsibly fast launches from washed out root drops), the Trail 24s were in near-perfect shape.

Finally, in “EVO Saga” news, Cannondale has responded favorably to my previous blog posts about my frame issues (I was actually contacted directly by Mandy Braverman from @CannondaleWomen on Twitter). Previous issues aside, it’s nice to see a company that responds to customer issues rather than ignoring them/pretending they don’t exist, or, even worse, deleting them from existence when posted in a public social media spot (ask Dan Hensley what he thinks about Specialized’s views on IMBA Rule #2). As of Tuesday, they are supposed to be shipping a new bike my way. This one should be non-defective and totally compatible with any PF30 bottom bracket available. I plan on tearing my current frame down again today in preparation for the new one’s arrival, though I’m not getting too excited just yet, because I don’t know if it’s shipped. I’ll keep you posted.

Supersix EVO Update

If you don’t know the story, scroll back a couple of days and read it first, lest you be totally lost.

First off, when I was told that the “surefire” bottom bracket cup kit to make my frame work was being overnighted to me, that wasn’t true. It was sent 2-day. When I opened the package, I find that I’ve been shipped a single aluminum bottom bracket cup. Unlike the “wrong” kit that was sent days earlier, which included two bearings, two cups, and an instruction manual, this is just one, bare cup (Joel talked to a C’Dale tech who said that it should have been two). I take a closer look and see that the only difference between this and what I’d received previously was that this was a normal cup that had been honed out a little (it was very obvious by the lack of anodization and scoring on the inside surface)

IMG_0609

I’m not even going to try to build any sort of suspense here. When I installed it into the drive side of the frame with the bearing, the bearing didn’t turn smoothly. It didn’t bind up nearly as much as before, but it made an obvious “click” as it rotated. There’s no way a bearing would remain viable for any length of time in that situation.

At this point, it was after business hours. I called Joel and let him know that on Monday, please inform Cannondale that the only viable options for me are to either A) get a perfect, new frame, NOW, with a perfectly functioning, ceramic bottom bracket installed without any shop-made band-aid fixes, or B) Send the frame back and get a refund. I’m not playing this “lets hone something out and hope it works” crap any more. This bike retails for $7700. I haven’t been able to ride it since OCTOBER.

I’m going to a road race in Arkansas tomorrow morning. I’ll be riding my cyclocross bike.

IMG_0607


Tubular Gluing How-to

If you’re a mountain-only type of person, this post will do one of two things for you- bore you to death and make you never come back, or be oddly fascinating as to why someone would take this sort of time to prepare wheels and tires just for road racing (in all fairness, tubular CX wheels/tires are used almost exclusively by serious CX racers, and tubular mountain bike wheels/tires do exist, they just aren’t that common).

A long time ago in a galaxy far, far away, all bike tires were tubular. I’ll spare you the explanation of what that means since Google is your friend, and just say that now, they’re generally only used in road, tri, and Cyclocross (and occasional MTB) racing. Gluing a tubular tire to a rim is a process that seems to mystify a lot of people. Do it right, and you have a very safe, reliable, lightweight, and incredibly buttery-feeling ride. Do it wrong, and your tire could come off of the rim, and you could wind up seriously injured.

So, let’s first go over what you can do that’s “wrong.”
-Not use enough glue
-Not apply the glue evenly/leave dry spots on the rim and/or basetape
-Not make sure that the basetape is pressed all the way into the center “well” of the rim when you install the tire
-Not prep the basetape/rim surfaces before applying glue
– Make a mess/install the tire backwards (won’t kill you, but doesn’t look pro, either)

Here’s how I avoid those things. Disclaimer- if you are currently searching the internet for “how to glue tubulars,” you’re likely to find different methods that will yield the same result- a well-glued tire. There is absolutely nothing wrong with any of those as long as the end product is the same. Heck- Poolboy Matt does it differently, and I’m about to race a set tomorrow that he glued for me last season. The important thing is, whatever method you choose, you avoid the things I mentioned above.

Supplies- acid brushes (available in the plumbing section of the hardware store), Acetone, Goof-Off, latex or nitrile gloves, truing stand, glue (I like Vittoria Mastik One), a skinny broomstick, and a helper for step 6.

1. Prep the tire. The night before you’re going to glue, put the tire on the rim dry and inflate it to 120psi. That will stretch it out a little and make it easier to install once it’s glued.
2. Prep the gluing surfaces. Wipe the rim and basetape of the tire down with some acetone. If there’s old glue on the rim, that’s ok as long as it’s not clumpy and messy. I usually soak those spots in a little acetone, which softens the glue and makes it “melt” a little into the fresh glue you apply to the rim.
3. Put electrical tape on the brake track of the rim. Trust me- It makes everything soooooo much cleaner.
4. First coat of glue. Inflate your tire enough that it starts to roll inside-out. Add air until you can lay it on a clean counter and the basetape faces up. It’ll look like this:
IMG_0577

(instagram it for added “hipness”)
Wear your gloves, and brush the glue on a little at a time, being sure to get it all the way to the edges of the basetape without going over. You want every millimeter of it to have glue on/in it. When you’re done, put it someplace out of the way so it can dry.
Put your wheel in the truing stand. Put a similar coat of glue on it Be sure that the glue is smooth and even from wall-to-wall on the rim. Leave it in the stand to dry. Keep cats away from it.
5. I give everything at least three hours to dry, but it won’t hurt to go longer (some people say overnight). At that point, evaluate as to whether or not you need another coat of glue on both surfaces…
-Basetape: some basetape is very “thirsty,” like the Conti in these pictures. I ALWAYS go with 2 coats on a very absorbent basetape. Tires like a Zipp tubular have a much less absorbent basetape, and, you’ll find that the glue you applied is already giving you a nice, solid sheen. This is where your judgement comes into play. If in doubt, apply another coat of glue and allow it to dry, just like you did before. It should end up looking like this:
IMG_0579

-Rim: Here’s another judgement call on your part. If you’re gluing a wheel/tire for road & crit racing, put another coat of glue onto the rim. In those situations, you’ve generally got more brake heat and turning force applied to the rim/tire. Also, someone who flats a tire in either of those situations is going to remove their wheel and get a spare from the pit/wheel truck. In most triathlons, not only will the the wheel/tire not be subjected to the same severe turning/brake heating forces as, say, a road-racing criterium, but also, if the rider flats, he/she will generally need to be able to remove the tire on the side of the road and install their spare. If you put another coat of glue on the rim, it’s going to be close to impossible to take the tire off without a lot of time and herculean effort. If in doubt, apply another coat and let it dry. It should look nice & smooth, wall-to-wall, like this:
IMG_0580

6. At this point, you have 2 dry surfaces with “enough” glue on them. The last coat of glue is a very thin one, only applied to the rim. Once you’ve done that, let the air out of your tire and call in your helper. Set the rim on a clean surface on the ground (I use a piece of cardboard on the floor). Stick the valve through (you remembered your valve extender, right?), and pull outward/down on the tire (making sure to keep the basetape centered on the rim) to wrap it around the rim and give yourself as much “slack” as possible for the last bit of tire. (If this doesn’t make sense, search youtube… I’m sure you can find a few videos there.) When you get to the last section of tire, you want to try your best to grab it and pull it over the edge of the rim rather than rolling the tire surface and sidewall through the glue- this is where an extra set of hands is very helpful.
7. Once your tire is installed, add just enough air to give it shape. Put it in the truing stand and start working your way around the to make sure that the tire is centered on the rim. Some people use the feelers on the truing stand to look for any wobbles. Whatever works for you.
8. Once it’s centered all the way around, uninflate the tire.  Lay your broomstick on the floor and roll the tire over it to insure good contact between the basetape and the rim. This is ESPECIALLY important if your rim has a very deep “well” in the middle. I usually make several passes, using my bodyweight to press down and really make the basetape and rim stick.
9. Inflate the tire to 120psi. Remove the electrical tape and use acetone & goof-off to clean up any excess glue.
10. Bask in the glow of a gorgeous job. Install wheels on bike and go kick everyone’s butt.

The Cannondale EVO Saga

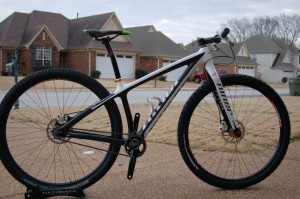
A BUNCH of people have asked me why I haven’t been on my fancy roadbike that I talked so much about last Fall. Well, it’s not often that I post anything on my blog that’s not 99% complementary of a company or their equipment, but, as I’m sitting here, waiting for a bike part that will hopefully allow me to ride my road bike after NOT being able to ride it for more than 3 months, I feel compelled to tell this story. Hopefully it will keep me from having to re-tell it because someone asks, “What ever happened to that Supersix??”

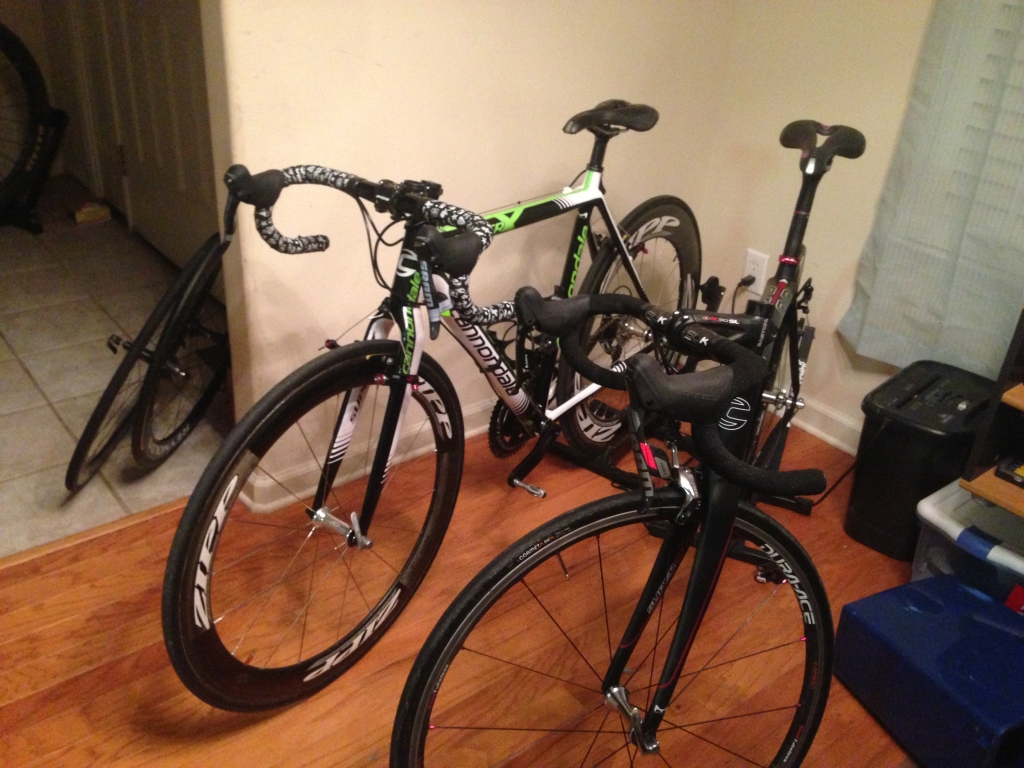
As you might recall, I received my Cannondale SuperSix EVO (women’s edition) back in October. If you’ve forgotten/missed it,  here’s a link: http://www.brickhouseracing.com/?p=4861

There was something I didn’t mention in that post.- When I first assembled it, the bottom bracket bearings (ceramic bearing, Pressfit 30) seemed to have some drag to them. I shrugged it off as new bearing drag and went about my business. However, in the back of my head, I couldn’t help but feel like I was working harder than I should have been.

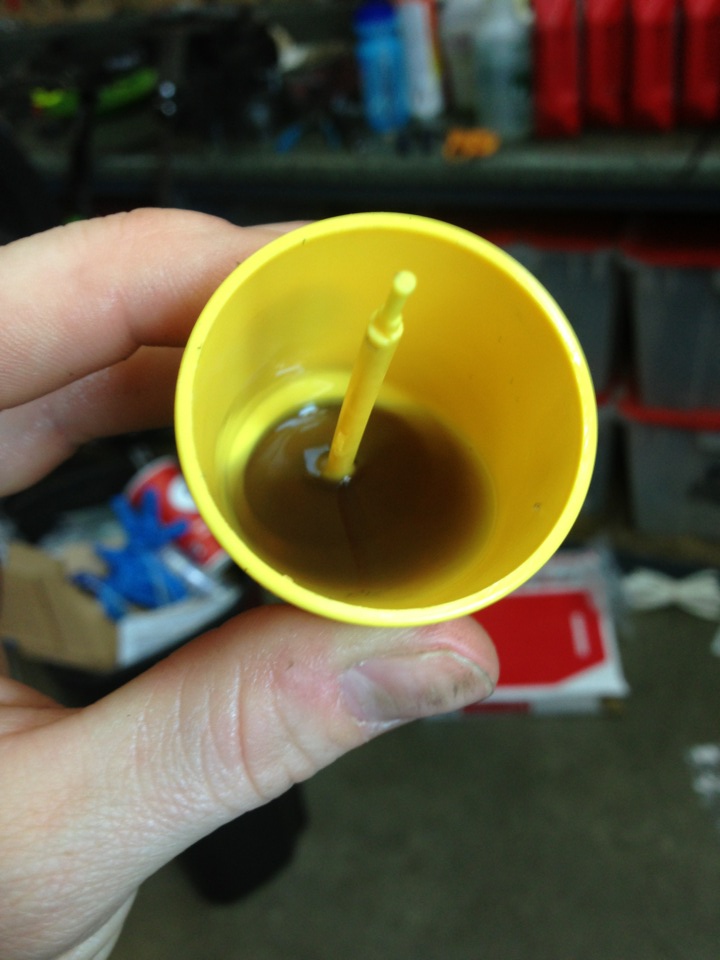
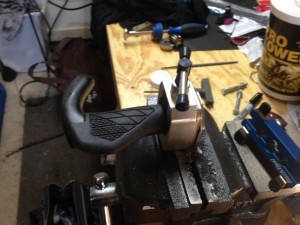
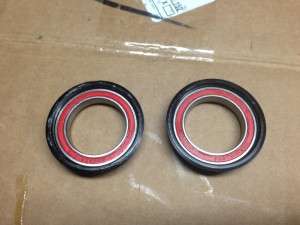
The super fancy Cannondale PF30 bottom bracket:
IMG_0589

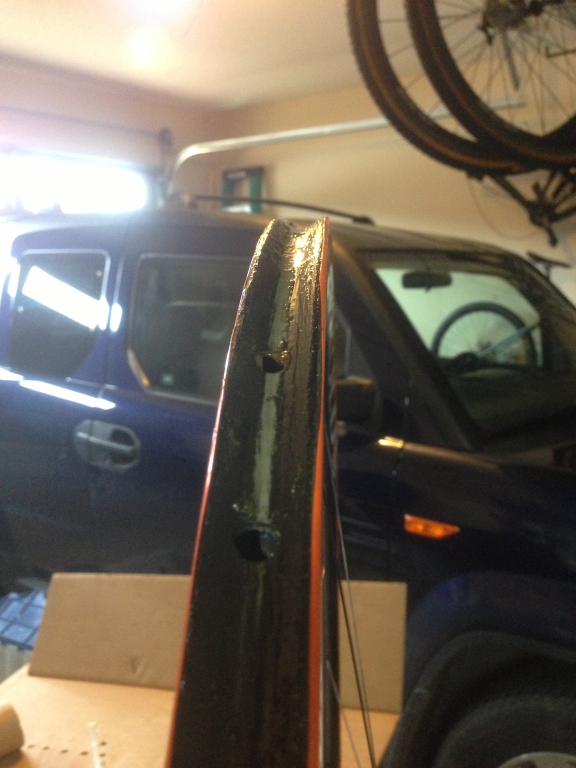
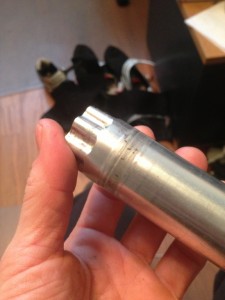
Fast forward a couple of weeks. I was giving my bike a little once-over and, as I spun the cranks, felt the same (maybe worse) drag on the bearings. I remove the crank and confirm with my finger that yes, the bearings are NOT spinning well at all. In fact, one of them is SO bound up that instead of it spinning with the crank, the crank spun inside of it, scoring the spindle…

IMG_0588


I take the bottom bracket out… suddenly, the bearings spin like a champ. Press the bottom bracket back in… bearings bind up. Obviously, the frame is out of tolerance, right?

I call Cannondale and leave a message w/tech. Eventually, someone calls back. He says it’s a bottom bracket problem, and says they’ll send out a new one as well as a new spindle to replace the damaged one. A few days later, the warranty parts arrive, only, it’s not a bottom bracket and spindle in the box, it’s an under-the-bottom-bracket cable guide and a spindle. I call back and get the bottom bracket headed my way.

Two days later, it arrives. It’s a plastic-cup/steel bearing SRAM PF30 bottom bracket. Not really what came in my bike, but, whatever, I’ll try it. It just so happens that Steve, our Cannondale rep, was at the shop when I finally had the time to install it. I press it in, and, whaddayaknow… bearings bind up. Not only do they bind up, but the drive side cup/bearing gets stuck in the frame. Like, REAL stuck- Steve, who could easily pass for a lumberjack from shoulder to fingertip, took some scary hard swings at it with the hammer, and it wouldn’t budge. He contacts the mothership and confirms that, yes, this is a problem with my frame, and not the bottom bracket.

What I heard next made me sad. Being the new, hot thing, I wouldn’t be able to get a replacement frame until the end of December. I decide I’ll make lemonade out of those lemons and go into full-on cyclocross training, riding a CX bike instead of a road bike for every minute of my pre-worlds training (outside of MTB rides, of course).

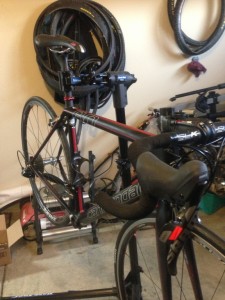
Fast forward again. My frame is supposed to be delivered while I’m at Worlds. It isn’t. My frame arrives February 8th. No idea why, but that’s when it got here. I’m stoked, so I take it home and start putting it all together. I press the bottom bracket in, and, the bearings bind up. Again. Just like the first frame. I call Joel, the bike shop manager/buyer from Outdoors and let him know that I’m boxing BOTH frames up to get shipped back to Cannondale. He talks to Cannondale, and they finally fess up…

Those frames are out of tolerance. It’s all of them. To fix this, they’ve manufactured new cups to fit into the out-of-tolerance frames. The cups are machined to accept a BB30 bearing without causing it to bind up, and they’ll ship a set to me. At this point, I’m getting mad. I’d been waiting since October for a new frame, and, in the meantime, they had a part that could have possibly made my old frame useable (if we could somehow remove the stuck PF30 cup from the driveside).

A few days later, I get the part. It’s a new set of cups (like the black ones that hold the bearings pictured above, but supposedly sized to not cause binding) and steel BB30 bearings. In my frustrated state, I call Joel back and tell him to contact Cannondale and kindly ask them to send a set of ceramic bearings, like the ones that originally came with my frame. He was happy to do so, and called me back a few minutes later with another report from Cannondale. In the 3 days since they’d last talked, they made a DIFFERENT set of cups for the EVO frame that supposedly work even better, and they’ll come with ceramic bearings, so DON’T use the kit I just got, wait for them to send a different one out!

So, that’s where I am now. They said that Wednesday, they’d get overnighted to the shop. It’s 3:20, and it hasn’t shown up yet. My bike lays in wait…

IMG_0586

Several people have asked, “Why don’t you throw a fit and get a frame that doesn’t need a proprietary part?” Well, the redeeming thing right now is that Cannondale offers a lifetime warranty on their frames. They stand behind it. We warrantied an early ’90s Raven MTB when I was at the shop. Of course, they didn’t have one of those as a replacement, but they sold the guy a Carbon Scalpel 29er at essentially an Employee Purchase cost. So, in the future, if the custom-cup thing doesn’t work out, I have faith that they’ll take care of me. Hopefully, though, this is the last you’ll ever hear about it.

Thing that needs to exist #327

Monday night on Just Riding Along, Kenny and I (Matt was out of town) discussed a need for a update/improvement to a bike part that only exists on the entry level/hybrid end of the market. It started with a discussion about gearing. I’m a big fan of 2×10 drivetrains. I’ve used SRAM XX and X0 as well as Shimano XTR. Kenny is a total 1xdrivetrain fanboy. His favorite setup now is either full 1×11 or, for the more budget-oriented build, using a 1×11 crank/chain (designed to work together to keep the chain on the chainring) and any clutch-type 10-speed rear derailleur.
Functionally, he’s had great success with both, but these are my holdups with them:
-On 1×11, the gaps in between gears would bug the hell out of me (10-12-14-16-18-21-24-28-32-36-42). I’m already swearing off 11-36 10 speed cassettes for the same reason (once my current one wears out, I plan on going 11-32).
-SRAM is slated to release different size 11 speed cassettes in the future, but then the problem of range comes in. If I’m gonna have gears, I want a similar range to the 2×10 I use now (39/26 up front, 11-36, soon to be 32, in the rear). I use the 39×11. It’s not often, but, in training on the road or during races that include some road sections, it is a gear that I find on a regular basis. This is why, on a 1×10 setup, the range just doesn’t do it for me. Like I said, if I’m gonna cart around some gears, I want my 39×11, and I want a granny gear of some sort (I’ve found that a 26×28 is really useful on most climbs, sometimes as low as 32, but I rarely find the 36)

SO, to get the range I’d like, the current 1×11 offering would work with a 34 or 36t chainring, but the gaps, as I mentioned, would set off my nit-picky/diva pet peeves. Enter, solution:

megarange

Make a baller 11-speed version of the Shimano Megarange that comes on cheapie bikes all over the world. My dream gearing would be essentially a 10-32 “10 speed” cassette (gears something like 10,11,13,15,17,19,23,25,28,32) with a 42 tooth low gear. Problem, solved. Gear divas all over the world rejoice, and I become a 1×11 fangirl forever. (P.S. There is this: General Lee Wide Range Cassette Adapter, which is interesting, but not really the same thing.) As for the haters who say, “that jump from 32 to 42 will NEVER work,” well, if a cheapass Acera on a Hybrid can make the jump, I see no reason why a baller-ass XX1 derailleur couldn’t hack it.

Of course, this is a lot of nit-picking over gears for someone who indulges in Singlespeeding on a very regular basis, but, until women’s singlespeed is a more popular race category, I’ll always be looking for the best (even if it’s just in my head) setup. SRAM, make my dreams come true…

A little bit about bike fit & setup

What started as a review of two handlebars had me thinking that, in the process of talking about the two bars, I should answer a couple of questions about bike fit. So, I’ll split the post, and you’ll get the bar talk tomorrow…

1. Picking the right size bike and making little tweaks:
What you see here are two Niner carbon hardtails- a Small Air9 Carbon and a Medium Air9 RDO:

IMG_0491

Why did I choose a medium bike when I bought an Air9 RDO? A) I was being a little impatient, and the small was not immediately available when they were released, and B) Two water bottle cages on the medium. How did I know that the medium frame would fit? I used the commonly-overlooked geometry measurements of Stack and Reach. These two measurements have the largest impact on how high/far away your handlebars will be in relation to your butt.
When I see someone ask, “what size bike should I get?” they can simply compare these two measurements with their current ride and get a very good idea. They can also help you figure out what length/rise/orientation stem they’ll need to make the new bike feel just like the old bike. In my case, I used these two measurements to figure out that with a shorter, negative rise stem (80mm, -17deg), I can get my handlebars in the same place in relation to my saddle when compared to the small frame (which, btw, is very cozy using a 100mm, -6deg stem). Here are the actual S/R measurements for the two frames:

size

I’ve got to throw in a pet peeve of mine here: Standover height is a bunk measurement. Depending on your proportions and a bike’s geometry, you may/may not be able to “stand over” a bike that fits you (or doesn’t fit you). Totally the absolute LAST thing you should even think about considering when it comes to bike fit. Still, people are so blasted stubborn about standover that bike manufacturers are forced to do things like make their size-small seat tubes so short that you only get a water bottle cage on the downtube. STOP IT, PEOPLE.
I know what some of you are thinking… “You’d think differently if you were male blah blah testicles blah blah” Guess what, guys- A) Stop acting like it tickles if I hit my crotch on my top tube, and B) if you wreck in a way that is going to put your tender boy parts in contact with your top tube, chances are, that’d happen whether or not the standover height was “OK” when you’re standing around in you tennis shoes in the bike shop. So, stop reading the outside of the bike box and listen to your mechanic.

I digress.

2. Flat bar vs. Riser bar:
The other tweak I’ve made between my small and medium frame was to flip the medium handlebar over. Both Niner flat bars are actually built so that you can run them “up” or “down” (the down position drops the bar 5mm). This brings me to another question I see all the time- “why would I want a flat/riser bar?” It depends on where you want your hands in relation to your saddle. Once your proper seat height/setback is determined (which, btw, should be done totally independently of your handlebar height/reach), you can use a flat or riser bar (in conjunction with spacers under the stem, stem dimensions/orientation, etc.) to put your hands at a height that’s comfortable for you. I like my bars essentially even with my saddle. That’s not comfortable for everyone- some people like them higher/lower. There’s nothing wrong with either way unless it’s not comfortable for you.

3. Other random tweaks?
Once you’ve got everything dialed in, you can work on the details. Bar width? That’s up to you, but always experiment with wider before you get to chopping things down. When you do start cutting, just go a little at a time- like 5mm each side at a time. Turns out, you can always take more off, but it’s pretty dang hard to put it back on if you go too far. I’ve found that 666mm is my “sweet spot.”
Also included are other things like setting the inboard/outboard placement and angle of your brakes/shifters/lockout, grip angle (if you’re using non-round grips), and bar-end angle (if you’re using bar-ends). I use Ergon grips on everything. I use bar-ends on the hardtails because I love climbing out of the saddle, and they give me both comfort and leverage to do so. When I got my geared bike set up, I realized that I like to have my lockout inboard of everything. However, this put my left shifter/brake lever out of comfortable reach. So, I made a modification to my left grip, which I eventually carried over to my SS because I liked the lockout position so much:

IMG_0488

IMG_0489

IMG_0490

That prettymuch covers the front end of your mountain bike. In the next couple of days, I’ll do a writeup on the differences between the standard carbon bar and the RDO bar.


SOLD! Air9 Carbon for sale, Round 2

Too slow! It’s outta here!

There was a little interest in the A9C frame/fork, but no solid bites, so here’s another offer:

DSC_5923

DSC_5925

DSC_5926

DSC_5927

Parts include:
Hayes Stroker Trail brakes
Truvativ Stylo Crank (32×17 gearing)
Hope Hubs (SS Rear)
Stan’s Crest/355 rims
Thomson Seatpost
Easton EA50 stem (100mm/6deg)
Truvativ Stylo Alloy bar
WTB Grips
The front tire will NOT be the Michelin in the picture. It will be a matching (to the rear) Hutchinson Python

$2,200

The original deal still stands if you’re looking to purchase a frame & fork only.

Bikes for sale

The only thing that’s currently on my mind is the huge rift in feelings between how outraged we are with physical violence but how, on a daily basis, people hurt each other and leave mental scars that take much longer to heal than the physical ones. Be kind.

In less emo news, Poolboy Matt has mine and Ryan’s previous road bikes on EBay. GO BUY THEM:

Ryan’s: Trek Madone 60cm w/SRAM Red

Mine: BH Connect 54cm w/SRAM Red


JRA #3

In case you’ve missed it, Kenny, Matt, and I have been doing a mechanically inclined internet radio show called “Just Riding Along” at 7:30 central time on Monday nights. It’s been a lot of fun- we essentially have a couple of drinks and talk about various topics like Chinese carbon, disc brakes for cyclocross/road, the difference between UST and tubeless ready, how much carbon is better than aluminum, and any other random topic that may pop up.

Tonight is episode #3, and I’m taking suggestions as to what we should talk about. I got in a real ride on a Lefty fork for the first time on Saturday, so I figured I’d give some feedback on that, but otherwise, we don’t have a lot of stuff lined up.

Suggestions from the peanut gallery? Anything vaguely technical/mountain bike related is an option.

You can also call in during the show and talk live on the air: (646) 595-4113

Link to the show on Blogtalk Radio: http://www.blogtalkradio.com/mountain-bike-radio/2012/11/13/just-riding-along

Share/like/post us everywhere on facebook/social media and I’ll give you a high five next time I see you.