I’ve come to notice a disturbing trend that’s taking the mountain bike world by storm. As “Gravel Grinder” bikes are becoming the newest hot thing (I’ll reserve comment about the whole gravel grinder specialty bike thing… Guitar Ted did a good writeup, and he’s much more qualified to opine on the subject than myself) . It’s not the gravel grinder trend that I find disturbing, it’s the utter lack of respect for handlebar tape I’ve seen on some gravel grinder bikes.
I understand- as a mountain bike person, you’ve only dealt with lock on/slip on grips. Now that you’ve got this fancy drop-bar bike, suddenly, there’s a new skill to be had with getting that overpriced strip of foam/cork/pleather wrapped around the bars in a way that covers the metal and doesn’t come loose. Uh… kinda a pain, but whatevs.
What you don’t realize is, it’s so much more than that.
Enter, the roadie world. Perfectly wrapped bars are more than just function. They’re a sign that your attention to detail is impeccable. It means, “I’ve poured over every detail of this machine as if it were a part of my own body.” At one time, white bar tape was used to denote the “captain” of a road team. There’s history there. The perfectness of your wrap job is a sign of respect to the activity of both cycling and wrenching itself.
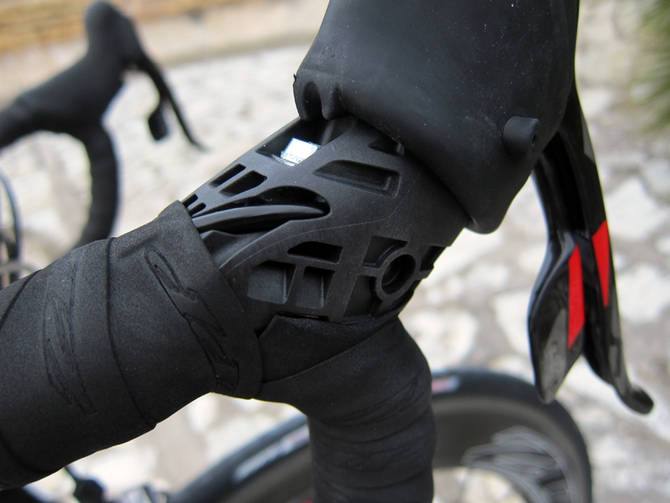
So, when I see things like this:

(The finishing tape… oh god, it’s so wrong)
…it’s as if someone got up during the eulogy of a funeral and talked about the time he had a raunchy one night stand with the deceased. You just don’t do that.
I understand- the guys at ESI (makers of the above tape) are, as I described earlier, just not privy to the tradition that surrounds the accessory. That’s why I’m making this post- so you, the gravel grinder seller/buyer/wrench/new wrench who just started learning, know exactly just how disrespectful it is to our sport to not take care and make the tape just right.
You’ll find instructional videos and websites all over the place, so I’m not going to go into detail about the process itself, just the small details that you should pay attention to when you’re wrapping bars.
-If the bar-end plugs that come with your tape have any sort of logo on them, make sure it’s upright and straight when you install them.
-If you’re using SRAM road shifters, make sure that the ends of the strip of “cover” tape for the back of the lever don’t come between the hood nubs and any of their respective holes in the body of the shifter. If you prevent the hood from resting in those spots properly, the hood will rotate around the shifter while you’re riding. I usually wrap the bar as normal then go back and trim the cover strip away from any of the holes in the shifter body before rolling the hood back into place. Rob Manning has a great photo of what I’m talking about in his blog post about 2012 SRAM Red:
-The finishing tape that comes with your tape is bunk. No one really uses it. You’ll want black electrical tape. Yes, electrical tape comes in other colors, and there’s some cool pin-striping you can do with it, as well as some fun color-swapping/customizing (see photo below), but black is always appropriate on every bike.
-The surest sign of a nice wrap job (aside from tight, evenly spaced, complete coverage of the bar with tape) is a good finish. When you read most taping instructions, you’ll see how to trim the last bit of tape at an angle so that it creates a straight line around the bar. That’s incredibly important to master prior to the application of electrical tape.
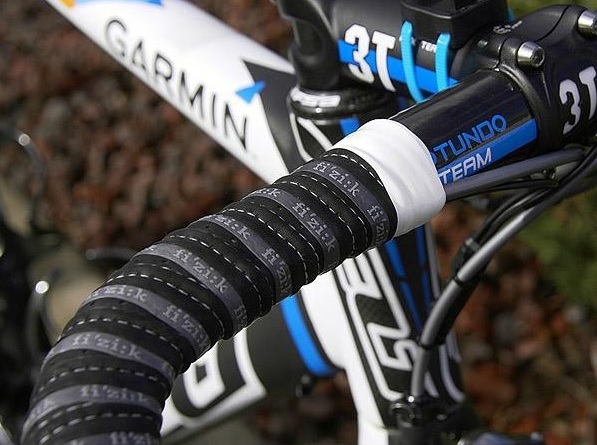
-The electrical tape goes on the bar tape… not on the bar itself. This is the most often violated “rule” out there. If you do everything else right, one width of tape wrapped around 2-3 times is all you need to keep your handlebar tape in place. Here’s one from the Garmin Pro team:
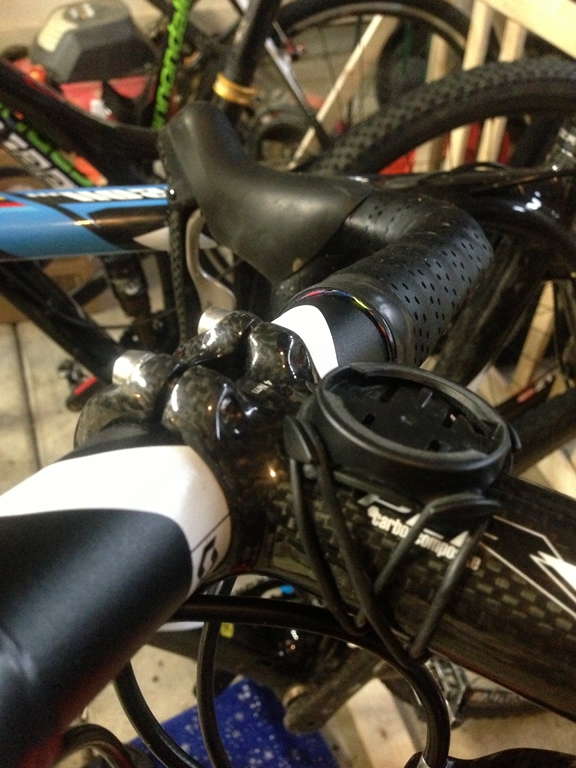
Also, it’s extra style points if you apply electrical tape in a way that allows a tiny bit of the cross-section of tape color to show on the edge (especially if it’s something cool, like the Cinelli Caleido Tape). See photo of Poolboy Matt’s bike:
-Finally, make sure that the distance from tape to stem is even on both sides. The tape should cover at least to the part of the bar where it gets fat for the stem clamp. I like 3 finger’s width (my fingers and yours may not be the same size, but 3 fingers is usually a safe bet, anyway). I’ve been known to count the number of wraps from end to lever then lever to finish, but as long as you can make them look symmetrical, one more or less on a side isn’t going to spoil everything.
So, there you have it. Like any other part of wrenching, it’s really about attention to detail. It’s the little touches that add polish to a job well done that make a big difference between a bike that just “works” and one that not only works perfectly, but that has the extra flair that makes it pleasing to the eye.
aw fer gawd’s sake
I’ve seen a lot of shop guys that can’t even get this right.
Seriously! Who say’s you have to run drop bars on a gravel bike? Most people seem to ride on the tops or brake hoods with drop bars anyway, so get something comfortable like an Answer 20/20 bar with Ergon GS2’s locked on.
The geometry of a gravel bike is what says you “should” run drop bars… the reach of the frames is shorter to allow for the several centimeters of extra distance between the stem clamp and where your hands are positioned when they’re on the hoods of the shifters. If you put a flat bar on the frame, chances are, you’d need an awkwardly long stem to get a proper fit.